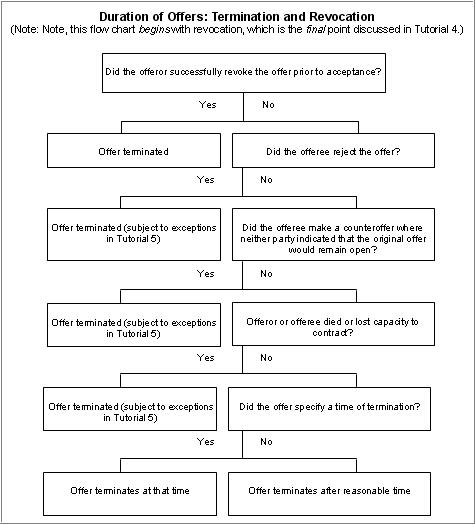
The following flow chart summarizes this tutorial. Note, the chart begins with revocation even though it was the last point discussed.
This tutorial concludes with revocation because it is the logical way to make the transition to the discussion in the next tutorial on limitations on the power to revoke. However, once you have mastered the material in the present tutorial, it is logical to begin your analysis of how long an offer stays open with the question of whether the offeror succeeded in revoking the offer.